
Let's start with creating the pattern for the pattern weight size owls. Any other size can easily be tweaked from this basic pattern with just a ruler.
The pattern pieces are simple to design yourself. You will need a 1/4th and a 1/12th piece of a 10" circle as well as two circles, one of 3" and one of about 1 1/2". That's all there is to it!
So, 1/4th of a circle has a 90 degree. That's a right angle. The 1/12th of a circle has a 30 degree. That's a little more complicated than 90 degrees but don't worry if you don't have a protractor handy, we can get there with some easy steps.
There are a couple ways to create the 1/4th and 1/12th of a circle pieces. Let's start with the one that requires little to no math and no figuring out angles.
Draw a 10" circle on an at least 12" square paper or card stock. I used a compass but you can use anything that is round with a 10" diameter. There's also the fail safe of tying a pen or pencil at one end of a piece of string or yarn and using that to draw a circle. It doesn't have to be exact, just close enough.
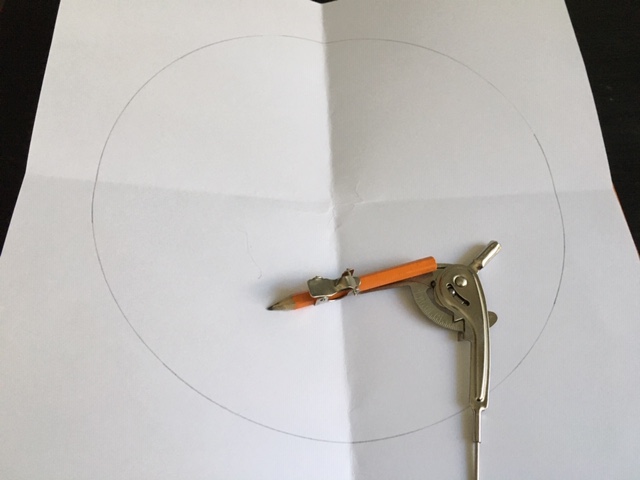
See the fold lines? Fold the paper in half. Unfold. Fold along the other half. This will give us our center point to put our compass or string/yarn at and will also provide cutting guides.


Use the fold lines as guides and cut out 4 quarters. Set aside one of the quarters. We now have the 1/4th circle pattern piece, which will be the owl's back and sides.
Now we need the piece that will be 1/12th of the circle. If we fold 1/4 in half we will have 1/8th of a circle. Fold the 1/8th size in half and we will have 1/16th of a circle, which is a step too far, since we want 12th. So will cut that small, last fold section off and we have 1/12th of a circle.

Now cut out a 1 1/2" circle and a 3" circle. These are the pattern pieces for the cardboard and the fabric that will wrap around the cardboard for the bottom of the owl.
You now have the 4 pieces necessary to make the owl pattern weights or a small pin cushion.

Mark down the center of the two body pattern pieces to note the fabric grain.
We can tweak the pattern a bit more.
You can fold the 1/4th of a circle in half again and cut along the fold line then mark one side as fold side and cut along folded fabric. This gives you a smaller pattern piece for storage and helps keep grain straight.

This will make small owls. Aren't they adorable? And so handy!

Other options using some math: use a protractor and make the sides as long as you want with a 90 degree center for the 1st pattern piece and 30 degree center for 2nd pattern piece. Use a compass or hand draw a circular edge between the two sides. So for the back owl piece, mark 5" up on the right side from the bottom right corner of a piece of paper and 5" to the left on the bottom of that same paper and draw an arc between the two. For the front owl piece, mark 5" up on the right side from the bottom right corner of a piece of paper and 5" 30 degrees to the left. If you don't want to do the math, don't worry about it, do it the easy way with some folding to get to where you want to go.
These little guys are easy enough to super-size.
Option 1: Create bigger circles to use as base for cutting the 1/4th and 1/12th of circle. (You only have to make 1/4th of a circle pieces with longer legs instead of a whole circle to save on paper.)
Option 2: Lay finished 1/4th and 1/12th of a circle pieces on larger paper or tissue paper and use ruler to extend sides to length desired. Just be sure that the legs are the same length and that the line connecting them is an arc.
No comments:
Post a Comment