Saturday, December 15, 2018

Felted Knit Clog Style Slippers


So, I wanted to make some felted wool slippers and I struggled to find a pattern for something I liked. I did find a lovely pattern for a pair that was made pretty much like an oversized anklet sock but though they shrank lengthwise they were like 3 or 4” too big around. (The cat loves them and sleeps on them every day.) They have already gone through the felting process twice so I am not sure if they will shrink around much more.


The blue slipper is the size the gray pair started out at before being felted. They felted beautifully but are way too big around.

After making those and having such bad luck I came up with this clog version. Love them! They are quick and easy, worked flat, and make me happy.


Sorry about the photos. This new place has horrible lighting for photo taking and I have no room to set up a studio area. Despite the bad photos, I think you can see how cute and cozy these felted slippers turned out.

This is my pattern:

Clog Style Felted Knit Slippers

Size 11 knitting needles (I used 24” circulars but they should work on straight needles also.)
Worked flat
Gauge = 3 sts per 1” and 3 rows per 1” in stockinette
Patton’s Wool
You can make these with 1 skein each of the two colors for the single stranded version but for the two strand version I recommend having 2 skeins each of the two colors. It makes it so much easier to work with two strands at the same time from two different skeins.
CO 39
R1: Knit 39
R2: K1, KFB, K , KFB, Place Marker, K1, Place Marker, KFB, K , KFB, K1
R3: Knit (knit all odd rounds)
R4: K1, KFB, K to 1 st before M, KFB, K3, KFB, K to 2 st before end, KFB, K1
K6: K1, KFB, K to 2 st before M, KFB, K5, KFB, K to 2 st before end, KFB, K1
R8: K1, KFB, K to 3 st before M, KFB, K7, KFB, K to 2 st before end, KFB, K1
R10: K2, KFB, K to 4 st before M, KFB, K9, KFB, K to 3 st before end, KFB, K2
R12: K2, KFB, K to 5 st before M, KFB, K11, KFB, K to 3 st before end, KFB, K2
Sole should measure about 6” x 12-13” and be 59 st on needles.
If you want these to be bigger you can do another knit round and then repeat round 12 to have 63 sts on needles.
Change color
R13: Knit 59 st
R14: Purl 59 st
R15: Knit to 1 st past second marker, turn, sl 1, P4, turn, sl 1, K3, ssk, K1, turn, sl 1, K5, ssk, K1, turn, sl 1, P6, P2 tog, P1, turn, sl 1, K7, ssk, K1 continue working the short rows until you reach the ends.
Slipping 1 will bring yarn to working position and the decreases will close the gaps caused by turning. Just always knit or purl together the gaps as you encounter them and work one K or P st past the decrease and eventually you will reach the ends.
K16, 17: Knit a row and purl a row then bind off the 31 (35) sts.
Seam the back few rows. Felt!
There are many ways to felt but I find what works the best for me is top loading washer with a few items to be felted and an old pair of jeans washed on hot with a normal load sized amount of laundry soap.

I made a pair with single stranded yarn and also a pair with two strands of yarn. The single strand of yarn felted up nicely and was the right size after one round through the washer but is definitely a thinner fabric. The double stranded pair is nice and thick but one round through the washer was not enough to felt it down to the right size. I can wear them with my thick SmartWool socks but they could be a size smaller. Another round in the machine should do the trick.

I LOVE these slippers. They are so WARM and comfortable. And darling, adorable to look at.

I wear a size 7-8 1/2 depending on the shoe style but you can control (sort of) the sizing with the felting process. For an average size 8 make the sole the 59 sts and for size 9-10 do another row with increases for a total of 63 sts. For smaller sizes, 5-6 stop at 55 sts for the sole. The upper part will be worked the same because it's just short rows worked across what's available.

Single stranded version.

Two strand version.


I am walking on carpet so I have not had any issues with being slippery but if you have wood floors or maybe tile, you can sew some scrap leather on the bottom for traction or those glue dots for grip.

Wool felting shrinks more height-wise than it does width-wise. (Over rows vs over stitches.) A good formula I found:
Felting good dense fabric:
Stitches (desired size) x 1.2 = pre-felted size
Rows (desired size) x 1.42 = pre-felted size

Felting very dense fabric:
Stitches (desired size) x 1.43 = pre-felted size
Rows (desired size) x 1.78 = pre-felted size


Sunday, December 9, 2018

Five Versions of Crocheted Snowflakes Plus the Russian Version


Crocheted Snowflakes


It’s that time of year! We’re thinking of festive holidays and snowy weekends curled on the sofa with hot chocolate or maybe a glass of wine and we’re looking around the room wondering what is missing in our holiday decor.  Snowflakes. You can never have too many snowflakes.

Many years ago when I worked at a bank on the West Coast I made paper snowflakes during downtime, sometimes others would pitch in creating our little 6-sided unique creations. Just fold the paper correctly and cut away, always being careful not to cut all the way through a folded side. No matter how hard you try, you can never get two exactly the same. That’s because snowflakes are unique!

Then I would hop up on the counters and hang the snowflakes with string and bent paperclips from the grating along the air vents, as well as cover the walls and bullet proof glass between us and our customers.

Sometimes it looked like a blizzard hit! That’s what people would say when they came in. They loved it though. All our customers looked forward to the paper snowflake blizzard for a few weeks out of the year.

I was in the mood to make some more permanent, crocheted snowflakes and came up with 5 different versions of some easy to crochet snowflakes that whip up super fast and easy once you get them down pat. These can be made with any yarn and appropriate sized crochet hook. I did the initial “let’s try this and see what it looks like” snowflakes with worsted weight yarn and then went back and did another one with Aunt Lydia’s metallic 10 crochet thread and a small crochet hook.

You can block them and stiffen them with a commercial stiffener, diluted white glue, or a sugar syrup solution or leave them soft and floppy.

Every snowflake version is unique, though with a pattern each snowflake of a version turns out the same. Try all 5 versions for a variety of unique snowflakes. I came across a video on YouTube in Russian and included the notes I made from that as well. The Russian version was a bit more work even though it’s still only 4 rounds but I included it because it’s a lovely, lovely snowflake and I will be making more.

A few notes:
Ch1 or ch2 at beginning of round is normally ignored in counts and ignored when joining. Slip into the first sc or dc of each round when joining.
After joining, slip stich your way up to the 3ch (or 5ch or 8ch) spaces that form the 6 snowflake points. All the work is done in those spaces that form the snowflake points.


Version 1.0
Ch 5, slip st to join
R1: 12 sc, slip in 1st sc to join
R2: ch2, 2dc in same st, 3ch, skip a sc, *2 dc in same st, 3ch, skip a st, repeat from * sl st into 1st dc to join and slip st to reach ch3 space
R3: ch2 (4dc, 3ch, 4dc) in each ch3 space, slip to join
R4: sl st to ch3 space, 2ch, *2dc, ch5, sc, ch 5 repeat from *
R5: *(1dc, 1trc) in same st, 3ch, sc in space, 3ch, sc, 3ch, repeat from *


Version 2.0
Ch5, slip st to join
R1: 12 sc, slip st in 1st sc to join
R2: 2dc in 1 st, 3ch, skip 1 sc, *2dc in 1 st, ch3, skip 1 sc repeat from * slip st to join
R3: (3dc, 5ch, 3dc, ch1) repeat in each ch3 space


Version 3.0
5 ch, slip st to join
R1: 12 sc
R2: *2dc in 1 st, skip 1sc, ch3 repeat from * slip st into 1st dc and slip st up to point
R3: 2dc, 1trc, 3ch, 1 trc, 2dc, 1ch in each ch3 space
R4: *2ch, 1 trc, 3ch, slip 1, 3ch, slip 1, 3ch, slip 1, 2ch, slip into base of trc, slip st to next point (ch3 space) and repeat from *


Version 4.0
Form magic loop,
R1: work (2dc, 3ch) x6
Join with slip st, work slip st to 3ch space, including 3ch space
R2: (2 trc, 3ch, 2 trc, 1ch) in each ch3 space, slip st to join
R3: (1dc, 3ch, 1dc, 5ch, 1dc, 3ch, 1dc, 2ch) in each ch3 space


Version 5.0
Ch5, slip st to join
R1: 12sc, slip st in 1st sc to join
R2: 2ch, 2dc in same st, 5ch, skip sc, *2dc in same st, 5ch, repeat from *
slip st in 1st dc to join and slip st to get to ch3 space
R3: All in same ch5 space: *2sc, 2ch, 1dc, 2ch, 1sc,3ch, 1trc, 3ch, sc, 2ch, 1dc, 2ch, 2sc repeat from * in every ch5 space


Russian Video Version
Form magic loop
R1: (8ch, 1sc) x6 in magic loop
Slip st in 1st sc to join and slip up to top of ch8
R2: 2ch, 2dc, 3ch, 3dc, *3dc, 3ch, 3dc* repeat between * 5x for a total of 6 points
R3: 2ch, 1dc, 3ch, 2dc, 5ch, 2dc, 3ch, 2dc repeat 5x
R4: *6sc, 2sc, 2ch, 1dc, 2ch, 1sc, 3ch, 1trc, 3ch, sc, 2ch, 1dc, 2ch, 2 sc, 6sc* x6
(the 6 sc are over ch3 space between points)

Also, for future reference, a crocheted star pattern that I received from a fellow crocheter.


R1: ch5, slip to join
R2: ch2, 1dc, ch2, (2dc, ch2)4x slip to join (there will be five points)
slip st your way to the ch2 space.
R3: ch2, 2dc, ch2, in ch2 space, (3dc, ch2)4x slip st to join
slip st your way to the ch2 space
R4: ch2, 3dc, ch2, in ch2 space, (4dc, ch2) 4x slip st to join
cut thread/yarn and weave in end at the center. Use remaining tail to create a loop for a hanger. You can stiffen these if you want.


Thursday, October 18, 2018

Plain Jane Wrist Warmers: A Foundation Pattern


I found some lovely yarn, a Cascade metallic, that I wanted to be the highlight of a pair of wrist warmers so I came up with a very basic, Plain Jane, pattern so that the yarn would be the focus. It's a great pattern! Turns out that I like the Plain Jane wrist warmers pattern with any yarn.

Can be used for the foundation of many more options as well. The pair to the left is made with the Plain Jane pattern but with a cable worked every 4 rows on the back and thus the thumb gusset moved over to the left side of the palm for the second one made.


The tan pair to the right is made with Colorscape yarn. It's a little thicker than the standard worsted weight I usually use. It's not bulky but it's thicker than worsted. I get confused sometimes when trying to figure out yarn sizes. Sock yarn and fingerling weights are easy enough to figure out. Bulky and super bulky are easy enough to figure out. Then you get in that mid-weight yarn and it can vary quite a bit even with the same designation on the label.

The instructions are for the heavier weight worsted but can be used for any medium weight yarn. For some lighter yarns I worked 12 rows between the seed edge rows and starting the gusset instead of 10 rows in order to reach my knuckles.

Since they are the same all the way around there isn't really a left hand and right hand for this pattern. Both hands can be made the same. Once you start adding patterns or cables to the back of the wrist warmers you will need to work the thumb gusset on the other side of the palm for the left hand but for this pattern it doesn't matter. It's Plain Jane. Easy Peasy.

Plain Jane Wrist Warmers
Worsted weight yarn (you can get two pairs from one skein of Colorscape)
Size 6 needles. I used magic loop but you can use DPNs or the two circular needle floppy method.
Gage: in stockinette, 4 st/inch

CO 32, join.
Rounds 1-3: seed stitch
Rounds 4-13: knit
On 13th row place a stitch marker after first 2 sts in round and after the next 3 sts. This is for the thumb gusset.
Round 14: K2, M, K1, M1R, K1, M1L, M knit rest
Round 15: knit
Round 16: K2, M, K1, M1R, K3, M1L, M knit rest
Round 17: knit
Continue increasing every other round after first st inside markers and before last stitch between markers until you have 13 sts between the markers.
After reaching 13 sts between the markers knit the second row of all knits then move the 13 sts between the markers to a holder. If you don't have a stitch holder just use a darning needle to move stitches onto scrap yarn. CO 3 using the backwards e method (need to replace the 3 sts we lost to the thumb gusset) then knit the rest of the round.
Knit 5 rounds.
Work 5 rounds of seed stitch. Bind off in pattern.

Thumb gusset: Move the 13 sts back to knitting needles and pick up 4 st to close up the opening.
Knit 3 rows. Work 3 rows of seed st. Bind off in pattern.

Weave in tails and your first Plane Jane wrist warmer is done!

Now just make the second one and you are ready for these crisp fall days or brisk spring days.

I used the alternating long-tail cast on because it matches ribbing or seed stitch start well.

Making one leaning right, grab the strand between two stitches from the front with the left knitting needle and knit through the back loop.
Making one leaning left, grab the strand between two stitches from behind with the left knitting needle and knit.

K= knit
P= purl
M= marker
M1R= make one, leaning right
M1L= make one, leaning left
Bind off in pattern= for seed stitch bind off, purl into knit then knit into purl, pass stitch over, continue
Seed stitch= K1, P1 across, next row purl into knits and knit into purls, continue working each row by working a purl or knit into opposite.

Getting ready to start gusset by placing stitch markers around 3 sts. I work the 2 sts at the start of the row outside the thumb gusset because I don't want to work the thumb gusset right on the edge.

Here's the completed thumb gusset with 13 sts between the stitch markers. Getting ready to move those 13 sts to a stitch holder and wrap up the wrist warmers. Only 5 rows of knitting and then 5 rows of seed stitch and we are in the homestretch.

Sunday, October 14, 2018

Putting Photos on Canvas with Modge Podge


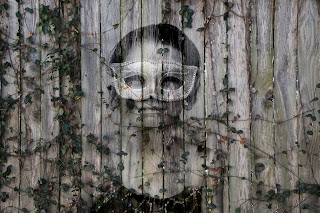
The older girls got to wear masks for a school dance and I took a photo of the youngest wearing sunglasses to keep her in the theme. I decided to play in PS with the images using a displacement filter. I love how the displacement filter onto a fence background turned out, like they're painted and faded over time.

I wanted to do an image transfer onto canvas but decided to start with using Modge Podge to glue down the images. They turned out pretty well. Painting the edges and sides black made all the difference.

I really like how they turned out.


I printed the images on my home computer on regular copy paper then painted the canvas with Modge Podge then placed the images on the wet canvas. Once they dried I applied a coat of the Modge Podge over the images, being careful not to go over the edges because I planned to paint them. Once they were dry I painted the edges and sides with black paint. Once dry, I did a second layer on top. Very easy to do and they have a great impact.

Wednesday, September 26, 2018

Crocheted Baby Fox Trio Versions 1,2, and 3


A fellow crocheter found a picture of a crocheted baby fox but could not acquire a pattern even with contacting the designer, so this is my version of that image, from 3 attempts. Each version has its unique qualities that I find adorable but version 3 is the closest to what she was looking for.

This is just the copy of my notes as I created the pattern and has not been tested or reviewed so there might be a few errors. If it's just a stitch count, just increase or decrease as needed to get back to the right count. I made multiple tails, ears, and legs from the pattern for the 3 versions and it worked. Sorry about the quality of the pictures as I don't have a studio area set up for product photography right now.

Each time I've pulled out the foxes to show I am startled at seeing how the faces light up, eyes sparkle, and the hands reach out when people see them.

All 3 versions were done with a size F crochet hook.

Join: When joining at the end of a round slip stitch into 1st sc of previous round to join then ch1 but that ch1 is ignored, so don't use in counts and slip stitch into 1st sc instead of the ch1. Work first sc into same position as the ch1.

Decrease = To decrease 2 sc into 1 sc, insert hook into front loop of 1st sc, yo, insert hook into front loop of 2nd sc, yo, and pull yarn through all three loops.

Increase = 2 sc in 1 sc

When changing colors, start new color at second part of last stitch of working color. Example, pattern calls for 6 sc in Color A and then switch to Color B, so work 5 sc in A, start 6th st with A and finish stitch with B.

Orange = O
White = W
Brown or Black = B

Ears for V 1,2, and 3:
Ch 9 with Orange, join, sc 8
R2: 8 sc
R3: 1 sc, increase 2x, 2 sc, increase 2x, 1 sc,  (12)
R4: 1 sc, increase, 2 sc, increase, 2 sc, increase, 2 sc, increase, 1 sc  (16)
switch to black or brown yarn
R5: 16 sc
R6: 1 sc, decr, 2 sc, decr, 2sc, decr, sc, decr, 1 sc   (12)
R 7: 1 sc, 2 decr, 2 sc, 2 decr, 1 sc, cut             (8)

Tail for V 1,2, and 3:
Start with brown or black
Magic loop, 6 sc
R2: increase 6x   (12)
R3: * 1sc, increase, repeat from *  (18)
R4: 18 sc
switch to orange
R5-6: 18 sc
R7: *3 sc, decr, repeat from * end with 1 sc, decr   (15)
R8: 15 sc
R9: *2 sc, decr, repeat from * end with 1 sc, decr   (11)
R10-12: 11 sc
add a bit of stuffing, cut yarn, leave 7-8" tail

Body for V 1:
Orange
Magic loop, 6 sc
R2: incr every stitch   (12)
R3: *1 sc, incr, repeat from *  (18)
R4: *2 sc, incr, repeat from *   (24)
R5: *3 sc, incr, repeat from *  (30)
R6-10: 30 sc
R11: *3 sc, decr, repeat from *  (24)
R12: *2 sc, decr, repeat from *  (18)
R13: *1 sc, decr, repeat from *  (12)
R14: *decr across                       (6)
cut yarn, leaving 7-9" tail, with darning needle, pick up every other stitch and tighten to close remaining hole.

Body for V2 and 3:
same as body for V1 except work 4 rounds of 30 sc instead of 5 rounds of 30 sc at R6-10.


Version 1 Head: 
Start with Orange
Magic Loop, 6 sc. join
R2: 2 sc into each sc  across      (12)
R3: 1 sc, 2 sc into 1 sc  across   (18)
R4: 2 sc, 2 sc into 1 sc, across   (24)
R5:  24 sc (work an extra sc at end of round)  (25)
R6: 6 sc with O, 6 sc with W, 6 sc with O, 6 sc with W, 1 sc O      (25)
R7: 5 sc O, 8 sc W, 4 sc O, 8 sc W,
R8: 4 sc O, 10 sc W, 2 sc O, 10 sc W
R9: 3 sc O, 22 sc W
R10: 2 sc O, *2 sc W, decrease, repeat from *
R11: all white now, *1 sc, decrease, repeat from *
add some stuffing
R12: decrease every stitch, join, cut yarn with 7-9" tail


Version 2 Head: 
Start with Orange
Magic Loop, 6 sc. join
R2: 2 sc into each sc  across      (12)
R3: *1 sc, increase, repeat from *  (18)
R4: *1 sc, increase, repeat from *   (27)
R5: *2 sc, increase, repeat from *   (36)
R6:  36 sc
R7: *5 sc, increase, repeat from * end with sc 1   (41)
R8: 6 sc with O, 6 sc with W, 10 sc with O, 6 sc with W, 4 sc O      (41)
R9: 5 sc with O, 8 sc with W, 8 sc with O, 8 sc with W, 3 sc O      (41)
R10: 4 sc with O, 10 sc with W, 6 sc with O, 10 sc with W, 2 sc O      (41)
R11: 3 sc with O, 12 sc with W, 4 sc with O, 12 sc with W, 1 sc O      (41)
R12: 2 sc with O, 14 sc with W, 2 sc with O,14 sc with W                   (41)
R13: 3 sc O, 22 sc W
add some stuffing
All white from here
R14: *1 sc, decr, repeat from * 
R15: * decr all across, join, cut yarn with 7-9" tail


Version 3 Head:
Start with Orange
Magic Loop, 6 sc. join
R2: 2 sc into each sc  across      (12)
R3: *1 sc, increase, repeat from *  (18)
R4: *1 sc, increase, repeat from *   (27)
R5: *2 sc, increase, repeat from *   (36)
R6: *5 sc, increase, repeat from * end with sc 1   (41)
R7: 6 sc with O, 6 sc with W, 8 sc with O, 6 sc with W, 15 sc O      (41)
R8: 5 sc with O, 8 sc with W, 6 sc with O, 8 sc with W, 14 sc O      (41)
R9: 4 sc with O, 10 sc with W, 4 sc with O, 10 sc with W, 13 sc O      (41)
R10-13: 3 sc with O, 12 sc with W, 2 sc with O, 12 sc with W, 12 sc O      (41)
R14: 3 sc with O, 26 sc with W, 12 sc O         (41)
R15: *2 sc, decr, repeat from * (work O and W as needed or just use W at this point)
add some stuffing
R16: *2 sc, decr, repeat from * 
R17: * decr all across, join, cut yarn with 7-9" tail


Attaching parts. Use photos for reference. These are notes I made while working up the first version on placements I used. Place where you like.
Hold body with end of magic loop facing you and place head with front edge on 3rd ring from starting center, attach to the body by sewing with the tail.
Tail, back of tail on/at center of end of body's ball facing back of head. Attach to the body by sewing with yarn tail.
Front legs, line up inner corners with 2nd rung from center.
Back legs, line up with front legs and tail bottom.
Sew on buttons for eyes or embroider eyes if needed for younger children's toy. Embroider satin stitch for nose.


Tuesday, September 11, 2018

Hands Down the Best Trivet/Potholder Ever

This crocheted trivet/pot holder is my go-to favorite. You can never have too many on hand.


Be warned: once you give one or a set as a gift you will be petitioned for more.

They are handy and multiple sizes make for great uses for multiple tasks. I like the small ones for the 1-quart pans, medium for 2-quart pans, and large for large pans or hot dinner plates, soup bowls, etc.

We are a society of eating on the couch while we enjoy our favorite shows and these make great plate trivets so you can hold your plate of microwaved leftovers in comfort. They can be used for pot holders, too, of course, microwave or oven, or even for those large pans whose handles or lids get too hot to handle. I actually bought a beautiful Dutch oven pan recently and was surprised to find that the handles were way too hot to handle once the chili had been cooking for a few hours.

A former co-worker told me how to do these almost thirty years ago and I have made an abundance of them over the years. They hold up really well. I am pretty sure I still have some of the original ones.

You will need cotton yarn. I like the Peaches N Cream cotton yarn for these (as well as dish clothes) and one skein is usually enough to make my favorite size trivet/pot holder. I use up the rest of the skein with the next trivet and then use another color to finish as needed. I like the stripes. Plus it makes them unique then.

Okay, a skein of cotton yarn is the first step. It can't be acrylic or it will melt. Wool is sort of an option, I guess, for those wool lovers. But these will be attacked by the food fairies so must be washable. I guess you can wash wool, by hand, or toss a wool trivet in the wash if you don't mind it felting. That's sort of a whole other project though. So if you want consistent, workable, no hassle or questions results, get yourself some cotton yarn. No matter how much you try to avoid it, food will find a way onto your trivet/pot holder.

Crochet hook: For these I used a size H. I often use size G also but could not find my G when I sat down to make these so H it was and that worked fine.
The green trivet is chain 20 +1
The cyan trivet with yellow stripe is 25 +1
The yellow trivet with gray stripe is 30 +1
The gray trivet is 40 +1

The most common sizes I make are with a 30+1 chain and with a 35+1 chain.

So with your size G or H hook, chain 35 +1, sc into first chain from hook, sc 34 (total 35 sc)
When you get to the end of the first row, do a second sc into the first ch then continue working sc on bottom side of initial chain.


When you reach the end of the bottomside row, sc into first sc of first row. (Don't slip stitch to join. This whole thing is worked in a spiral, no stepping up.) Then continue working sc around and around.

You will see a boat shape forming.


Periodically check to see if you've reached enough height to form a square. Just press the front and back of the boat down.


Once you have reached the height where if you push the sides down and the top edges touch, cut yarn, leaving a tail about 2-3 x the length of the area needing to be seamed. (Don't worry if the edges curve out a bit when checking. Once the majority of the edge reaches to touch each other, sc to the top or bottom (middle side of the boat) and cut tail. It will flatten fine even if it doesn't match exactly.) You can turn it to either side that you wish. When I do stripes with a different color I turn it so that the yarn tail that I crocheted over is inside instead of outside to keep it out of sight.


Do a running stitch with a darning needle to close up seam. You could also slip stitch it closed but I like the running stitch with a darning needle. The running stitch leaves a nice, flat seam.


If desired, you can chain a small loop and attach to the corner for hanging.

If you give these as gifts, be prepared to have people asking for more!


Gray trivet: 40+1 chain
Yellow trivet: 30+1 chain
Cyan trivet: 25+1 chain
Green trivet: 20+1 chain

Tuesday, August 7, 2018

Simple One-Piece Fabric Backpack with Flap


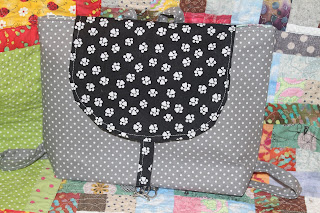
These are simply yet handy children's backpacks. I made them for birthday gifts for a nine year old and a six year old. They turned nine and six on their birthdays, which were one week apart. According to the nine-year old, this was the best birthday gift ever in her entire life.


I just improvised with what I had and did not take strict measurements of this. There are some things I would do differently so when I make the new version I will post more detailed instructions with measurements. But this is what I did with this initial experiment.

Supplies:
D-ring (or keychain ring will work)
2 fat quarters, one for exterior and straps and one for flap
enough fabric for lining piece
Swivel hook
thread

I started with fat quarters for the exterior and some fabric by the yard I had on hand for the lining. I cut 2 pieces 3"x 22" from the side of the fat quarter for the straps, then squared up the remaining piece of the fat quarter. (Not literally square, just straightened sides.) 

Straps: Fold the strips in half lengthwise then fold edges into center fold. Sew along both sides of the straps. You could cut them 4"x22" for a wider strap but this will make the backpack smaller if relying on the fat quarter for fabric.

Bag: Cut the lining piece the same size as the exterior piece. Place ends of straps inside at bottom corners. tack in place. Sew up the sides of both exterior and lining pieces. Leave a 3-4" gap in a side of the lining piece for turning. Place the exterior inside the lining with right sides touching. Place free ends of straps 1" from center. Tack in place. Make sure straps aren't twisted. The side with the straps sewn near center will be backside of bag. Sew together along top edge on the wrong sides. Pull through opening left in lining. Topstitch top edge and sew lining gap closed.

Strips for D ring and Swivel Hook: Cut 2 strips 3 1/2"x 4" for straps for hook and D-ring. Fold into thirds and sew along both sides the long side for both straps. Fold in half lengthwise and slide D-ring and swivel hook down onto fold.

Flap: Cut 2 pieces of another fat quarter (paw print fabric for this backpack) and round both corners on one end. I used a candle holder. Place the pieces right sides together and insert strap with swivel hook inside with raw edges meeting raw edges. Sew around flap edge, backstitching a few times over strap to reinforce it. Leave top edge unsewn. Turn, press out along sides and curved bottom then topstitch.

Mark center of flap and center of back side of bag. Place flap on back side with curved side down and raw edges 1" below the topstiching at the top of the bag. Flip flap up and topstitch in place. This will cover the flaps raw edges and hold the flap in place.

The last part is the strap with the D-ring. This is why I will do it differently next time. Since the bag exterior was made from one piece of fabric this tab has to be hand sewn in place. Next time I will do two pieces for the exterior so that I have a seam to enclose the tab into. So, sew the tab in place.

Voila! A handy, simple, fun backpack for the child of any age. :)


Saturday, June 30, 2018

Organic Knitting on the Fly

I found some lovely yarn on clearance at Michaels but there were only two skeins. So it was time to get creative and see what I could do with 2 skeins.


(My camera has gone kaputt with strange color lines but my backup needs charging so these will have to do today.)

It's a lovely yarn, soft and has a nice drape. I decided to go with bigger needles than necessary for such a thin, lightweight yarn and make a cover/wrap. That involves a back then splitting at the shoulder for two front panels and tacking a few inches on the sides to create sleeves.

Since I only have two skeins I decided to knit as long as I could on the first skein then call that the back length and start the front panels with the second skein.

With size 6 circular needles I cast on 140 sts, using the alternating ribbing cast on method. I have posted that here before.

Then work about an inch of ribbing then about 2" of moss stitch (k1, p1 across then on following rows knit in purl and purl in knit) to keep the edges from rolling.


I placed markers after 10, 30, 50, 90, 110, 130. The first ten and last ten stitches are worked in moss stitch. After the border is complete stitches 11-50 and 91-130 are worked in stockinette. I put the markers at 30 and 110 for counting then left them because I think I will do a design on the front. Stitches 50-90 are what I call holey stitches.

Holey stitches, multiple of 4 worked in 4 row repeats.
Row 1: k4, yox2, k4, youx2....end with k4
Row 2: k2, ssk, (p1, k1 the 2 yos), k2tog, *ssk,p1,k1, k2tog, ending with k2
Row 3: k2, yo x2, k4, youx2.... end with k2
Row 4: ssk, p1,k1, k2tog....

I still have plenty of yarn left in the first skein and have reached a length that would work well for the cover but I plan to go a few more inches.

I wish I had thought to do a self-edging icord on the sides as I worked but did not think of it until I had several inches of the back completed above the edging and I did not want to tear it out and start over and I certainly did not want to start the new edge partially up the sides. For the next one though...

Thursday, June 7, 2018

One-Piece Leather Zipper Pouch

You can never have too many zipper pouches, right? I use them for everything imaginable and they are so handy when traveling.


The leather pouch on top is my old pouch with the worn out zipper.

I made this leather zipper pouch probably about ten years ago. I have had it so long that I have forgotten just when I made it. Probably more than ten years ago. It was one of my first experiments with leather. Leather is a unique beast to sew. It can be done on a home machine with some patience and a few learned skill sets. A walking foot is very helpful also.

The zipper has gone kaputt. I won't toss the pouch just yet because I am hoping that maybe I can fix the zipper teeth somehow. I've seen some magical solutions to this problem though I don't remember them exactly at the moment. If nothing else I will tear it apart and resew with a new zipper. That option will change the dynamics and dimensions of the pouch however. Unlike with fabric, ripping out a seam from leather leaves holes. Unsightly holes. So it's a project for another day.


The project for this day is to make a replacement leather one-piece zipper pouch with a small header. I found some fun leather at Tandy Leather and made this lovely little number.

Materials:
1 9" zipper with plastic teeth
1 8"x 12" piece of leather
1 8" x 12" piece of fabric for lining
Coordinated thread


Place 8" side of leather edge to zipper tape edge, right side of leather facing right side of zipper. I arrange so that the metal stopper beads on zipper are out of the way of fabric edges so they won't be in the way when sewing the sides in a future step. On the other side of the zipper tape place 8" side of fabric to zipper tape edge. The zipper will be sandwiched between the leather and lining fabric. Right sides of leather and lining fabric will be touching. Be sure to align along sides.


After sewing the leather and lining to zipper, finger press back and topstich. I change stitch length to 4 for topstitching leather.

Now do the same for the other side of the zipper with the other ends of the leather and fabric pieces. You will have two loops of fabric.


Unzip zipper and turn. Topstich the second side. It's a little bit of a pain to reach the edge where the zipper head is but you can use a longer zipper if wanted. I just sew as close as I can get because the edges will be sewn in the next step anyway. Turn it back inside out.

Now open zipper at least halfway. If you forget this you won't be able to turn your pouch after sewing sides. Align pouch so that there's about 1" of material above and the rest below.


If you want a tab or ring, tuck it into side, raw end out, along bottom zipper tape. Or you can add a grommet in the header when pouch is finished. Or you don't necessarily need one at all. I cut a slim piece of leather long enough to provide a thumb loop and inserted it by zipper at the loose end before sewing up the sides. I insert tab on side where zipper opens from.

Sew up sides. Be careful of metal stopper beads on zipper. Do not sew over those. Hold zipper securely in place at its loose end until secured with stitching. Backstich and sew over zipper several times to reinforce it. I sew over it, backstich to edge of zipper and sew over it again at least two times.

Dealing with raw edges options:
1. just let them be. The original pouch had raw edges for ten years of use and was not a problem.
2. zig zag along edges to minimize fraying
3. cover with binding
4. trim with pinking shears

If you choose option 2 or 3, only do the edges below the zipper.

Now turn bag right side out. Poke out those corners into nice neat points then topstich 1/4" or 1/2" from zipper to hold header in place. I line up zipper foot with edge of leather along zipper tape.

Just lovely.


Sunday, June 3, 2018

Super Easy Fabric Baskets with Decorative Flaps


Aren't they adorable? I think so. And so handy.


Super easy as well. Let's get started. These are my notes on the ones I made for reference.

This basket starts with an 18" square fashion fabric enforced with stiff interfacing and an 18" square of fabric for the lining.

Iron on the interfacing to the backside (wrong side) of the fashion fabric. I used Pellon 808 for this basket and it worked very well. The extra stiff Pellon craft interfacing would work well also but is not necessary for the basket to hold its shape.

Place the two fabrics right sides facing and sew around with 1/2" seam, leaving a 3-4" opening in the middle of one side for turning. Clip corners and turn. Poke out corners and smooth sides then topstich 1/4" from edge around all four sides (this will close the opening left for turning).

Fold in half. Measure 3 1/2" from bottom corner and mark on bottom and side then draw a line to join the two points. Do this for right side and left side. Sew along diagonal line. Be sure to backstitch at edges starting and ending the seam.

Now fold in half on the other side. This will feel a bit awkward as the first two corners will distort the rectangle a bit but it will work fine. Measure 3 1/2" from bottom corner up along side and down along bottom fold and mark then draw diagonal line between the two points for both sides again. Sew along the diagonal line for both sides.

Whatever fabric side is facing you when sewing the corners will be the lining.

Turn inside out. Fold tabs down onto sides of basket. Topstich 1/4" from edge along top to hold tabs in place.

The tabs inside the basket can be tacked in place. Or they can be cut 1/4" from seam and surged or zig-zagged to cover the raw edges. I left in to provide added support.

I ran out of Pellon 808 and the replacement was Pellon 809 which is firm but did not feel as firm as 808 so I attached to both fabrics for the owl/polka dot basket. Worked really well.

Baskets can be custom sized for any dimension.

What I've made so far:

A. 18" square 3 1/2"x 3 1/2" Finished 5" h x 7 1/2" w
B. 16" square 3 1/2 x 3 1/2" Finished 5" h x 5 1/2" w
C. 12" square 2 1/2" x 2 1/2" Finished 3 1/2" h x 4 1/2" w
D. 12" square 2" x 2" Finished 3" h x 4 3/4" w

I plan on making a chart once I get some more done of varying dimensions but this gives a general idea of results that can be expected.
A.


C on left and D on right.

(B got put to use right away so I did not get a picture of it at this time.)