Tuesday, October 13, 2015

Quilted Log Cabin Coasters


The scrap buster Quilted Log Cabin Coasters.

I have a box of scraps. You know what I'm talking about. That awesome fabric piece that you are convinced that you can find a way to use it because it's just too pretty to throw away. All those pieces find their way into The Box. This project is a way to use up all that fabric in The Box.


Talk about the best scrap project!


These make fantastic gifts but you’ll want a few sets yourself. Warning, making these gets a bit addictive because they are so fast, easy, and fun. Since they are a scrap buster, don’t worry about making six exactly identical coasters. In fact, I made a point to make them all slightly different by having 5 of the 6 pieces the same and at least 1 piece not match the rest. That keeps the cohesive feeling but also makes them unique.

This is the best scrap buster project!

Since they are a scrap buster, you can also sew smaller pieces together to form the bigger pieces. Example, you need fabric for a 3 ½” piece but only have 2 ½” in fabric so you can sew a 1 ½” piece to the 2 ½” to get 3 ½”.


To make a set of six coasters you will need:
12 2”x 2”
12 2”x 3 ½”
6 2”x 5”
6 5”x 5” flannel or batting
6 5”x 5” fashion fabric for backing


Sew two 2” squares together at A and B using a ¼” seam. Press seams as you go. 
Sew AB to C. 
Then sew AC to D. 
Finally sew E to DAB. 

Layer in this order, 5” square of batting, pieced 5” square right side up, and then 5” square backing fabric right side down.  Sew around stacked squares, leaving a 2”-3” opening on one side to use to turn fabric. Trim corners. 

Turn fabric. I like to reach into farthest corner from opening and pull that through then the rest comes through fairly smoothly.


Make sure all corners are poked out. You can use a chopstick or any dull pointer. Topstitch around finished square, being sure to catch opening in seam to close it. Or you can hand stitch it closed. 

To do the quilting you can get creative or just sew across the finished square a few times to hold everything in place.


Tuesday, October 6, 2015

Stained Glass Fingerless Mittens

Stained Glass Fingerless Mittens with Rolled Hem Top


I love fingerless mittens. They are really very practical in Northern Minnesota when the weather turns cold. I take a lot of photographs and some of the most inspiring events happen when it’s briskly cold. In Northern Minnesota “brisk” might have a slightly different connotation than in other parts of the U.S. Here, brisk means that it isn’t cold enough to cause frostbite within ten minutes of exposure to the air but it sure feels mighty uncomfortably cold, hence, brisk.


When you’re out with the camera on the tripod in the dark trying to capture the Milky Way or Northern Lights you need to be able to feel the camera controls with your fingers but that brisk night air is making your hands feel frozen. That’s where the fingerless mittens come in so handy. Just a few weeks ago we had a brisk, clear night when the Northern Lights were out and I was so glad to have my fingerless mittens.


Plus, they’re just fun and cute. When I designed these Stained Glass Fingerless Mittens they caught the attention of a lot of people and the comment was consistently, “how fun!” and “those look so fun”. I should have named them Fun Fingerless Mittens but Stained Glass Fingerless Mittens seemed to be a better fit.

You can get the pattern on Ravelry or on Etsy.

The rolled hem top is a departure from the normal style I make. Usually I like the ribbed top so that it holds tight against the hand. With the rolled hem you can roll it down to give your fingers more mobility and roll it up to cover more of your hand. Plus it's cute.

Thursday, October 1, 2015

Knitting in the Round – Beginner vs Experienced


When I started designing patterns I looked into what was considered what experience level. I was startled to learn that knitting in the round is considered experienced level. I really thought that knitting in the round was a beginner level. Not necessarily easy beginner but definitely only needing a little bit of experience with getting to know the knit stitch and purl stitch to graduate to knitting in the round. Other than taking a look to make sure that the knitting isn’t twisted on the needles, knitting in the round is just a matter of placing a stitch marker and start knitting at the first stitch on the needle(s).

A good first in the round project is a simple ribbed stockinette cowl. The ribbing will keep the ends from curling up. Cowls are really on trend right now and that’s a perfect project to learn knitting in the round. Cast on desired stitches, depending on yarn size, needle size and the gauge you knit at.

For example, on size 6 needles with a worsted weight yarn (4) cast on about 80-90 stitches (keeping it an even number will make ribbing simple to keep track of because the round will always end on purl so you start new round with knit every time) Check that the stitches didn’t twist, then just start knitting into the first stitch on the other end of the circular needle. 
That’s it.

Go ahead and knit that entire first row. A few rows or a few inches of 1x1 or 2x2 ribbing will help keep the ends from curling up. Then just knit around and around until you have the height you want and do the same number of rows or inches of ribbing as at the start. Bind off loosely.

Voila! A cowl knit in the round. As simple as can be. It’s when we start with the special cast ons and bind offs and some stitch patterns that it gets into the experienced range. Don’t worry about that with the first project.

I think knitting should be fun. If it’s not fun the knitting needles just get dusty. Knitting in the round should be considered beginning level. Maybe not an easy beginning but definitely a "few projects under the belt" beginning. Give it a shot! When in doubt, bring out that nice smooth, inexpensive yarn, and don’t be afraid to rip it out. But I think you’ll find that working a ribbed, straight stockinette cowl in the round is a doable beginner project.

Tuesday, September 29, 2015

Katniss Huntress Cowl

Katniss Huntress Cowl

Are you like me? Did you sit up straighter and say Wow! when you saw the funky asymmetrical cowl that Katniss wore in the Hunger Games? It’s pretty awesome, isn’t it? 

I looked for a pattern off and on a few months after seeing the movie and never saw an inspired version that really gave me the same shivers as the original. A lot of skilled knitters have been busy designing in the interim, trying to capture that same shivery impact.

The original cowl was not even knit. It was woven. Crazy, huh? It certainly looks knitted. More than that, there are some versions out there now that come mighty close to that Katniss cowl. Pretty impressive. 

The challenge was there and a few designers came up with knitted versions that come mighty close. Most of them incorporate both crocheting and knitting but they did it, they managed to knit what was originally made on a loom. I find that mighty impressive. So many talented people out there.

It's the rope-like cords forming the cowl that I find most striking. I've seen some versions where the cords are simulated with alternating rows of garter or reverse stockinette. I was thinking welting could have been used to form the cords, before finding out that it was woven. I think an icord or welting would generate the same effect. The rest looks pretty basic. It's the cords that look tricky and to me what makes the original cowl stand out.

I hope to try my hand at making a version as soon as I have a bit more time. I already got the yarn. It really strikes a primal chord inside me, that raw, primitive covering with its purely functional purpose.

Staring Back at Terminology Fear

Let’s face it, knitting has many categories of fear.

There’s the fear of circular knitting needles. Speaking from experience, how many of us beginners looked at circular knitting needles and cringed? What was up with that idea of no end, just two points and a skinny little strand of cable that I was convinced would cut right through the yarn. If nothing else, I was sure that the live loops would shrink and I wouldn’t be able to get them up onto the main needle part at the end. Fear. I avoided circular knitting needles for years.

Kind of like discovering continental style, once I used circular knitting needles for the first time I saw that smiling woman at the open door, waving to come on in to this wonderful world of circular knitting needles. Oh, such lovely dears, the circular knitting needle. Once you work out the kinks from being held in that unforgiving packaging, that cable makes life so much easier.

Double pointed needles. Argh!! Little pointy sticks sticking out all over the place. The first time I used them I was convinced that all the live stitches would drop off. They didn’t. Well, not on the wood ones. I have some metal DPNs that it’s come close a few times. It was just fear holding me back though. People have been knitting with these for probably thousands of years. There's a reason they exist. Handy little buggers, DPNs. Don't worry about magic loops just yet. DPNs should be in everyone's knitting arsenal.

Then there’s gussets, putting stitches on stitch holders to save for later work, cables and cable needles, and even knitting in the round. I personally never feared knitting in the round. I took the plunge into circular needles and DPNs in order to work in the round. Never purl again!!!! Who wouldn’t get excited about knitting in the round. Okay, there are times when purling has to be done in the round as well but not very often once you get through the ribbing. But let’s face it, for beginners those are all scary terms.

Once we understand each individual technique it loses its stranglehold on our fears. Simply taking each new thing one step at a time really shows how not scary it is. I always recommend to anyone I teach or who asks about learning knitting, buy a cheap, cheap skein of yarn and knit, rip it out, knit, rip it out, knit. How many of us go to the local yarn store and spend $20 on a single skein of glorious yarn that tickles our senses and we go home and we look at that expensive, lovely, special yarn and freeze up because we are afraid of messing up with that awesome, expensive yarn?

Practice on cheap, rough, scruffy, tough, yet smooth yarn. Spend $2-$3 on some yarn at the large chain craft store or department store and mess up as much as you want. It doesn’t matter. Just rip it out again. Be sure to buy a smooth yarn for this foray into throwing caution to the wind. My niece decided to teach herself crocheting and went and bought some boucle yarn. Of course she gave up. Experienced crocheters and knitters pull their hair out when working with boucle. All those little loops and strands get caught and hide your stitches so you can’t even see what you’re doing.


So get out there, armed with your smooth $3 yarn, and make samples of everything you want to do. Make a gusset. Do a short row. Make a cable. Pick up stitches. Lost track of how many rows between cable crossings? Rip it out. Holes showing between short rows because you forgot to wrap the last stitch? Rip it out. This is your classroom. The cost of $3 for yarn that will only be used to make samples is quite a fair price to learn all the techniques that would scare us into immobility with our special $20 yarn. Save that $20/skein yarn for the project that always scared you before you mastered the technique with the fearless cheap yarn practicing.

Sunday, September 20, 2015

Learning to Knit


I was about 10 or 11 when I learned to crochet. At some craft event at school when I was about 9 we learned to make a crocheted chain with a finger and yarn. I can still remember that thrill of having made “something” out of almost nothing. It took a year or two before I picked up a crochet hook and took the next step from making chains to that first row into the foundation chain. I’ve crocheted a lot of things over the years; afghans, toys, candy dispensers, and even clothes.

I always wanted to learn how to knit because to me crocheted clothes just didn’t cut it (crocheted clothes designs have come a long way since then) but I couldn’t find anyone who knew how to knit. So when I was sixteen years old I went to the library and checked out a knitting dictionary and taught myself how to knit.

I had a rudimentary understanding of knitting and the only method shown in that library book was American (English) style. It took forever to knit something. I always joked that I could crochet a house in an hour but it took six months to make a knit scarf. If I was in the middle of a row of knitting I could not stop until I got to the end. Nothing could interrupt my finishing that row or I was lost. Worse, those knit scarves curled all up. Drove me nuts. My second knit project was a T-style sweater. Yeah, I tend to jump in with both feet. I’d made a scarf, a sweater was a logical next project. It turned out all right. Except it was a size 3X and I was a size small at the time.

I never enjoyed knitting. I was only doing it because I liked how it looked better than crocheted for some things. Well, many things. I love my crocheting but it just doesn’t work as well for clothing, including accessories. I remember when my mom made us crocheted mittens when we were young. The crocheted mittens were forced upon us. She didn’t care that we couldn’t move our thumbs or that there were holes letting cold air in, never mind the fact that they were plain ugly. The crocheted mittens got lost very quickly.

My knitting needles grew dusty. Somehow over the years a few lost their mates also. Not sure how that happened but I have many knitting needles that are all alone. I think I used them to push stuffing into sewn dolls or toys and they never saw their other half again.
Then about six years ago I saw a show on PBS called Knitting Daily. That show inspired me. Truly inspired me. The first time I saw continental style knitting I had to learn it. Oh, what a difference it made! It took some practice but it didn’t take that long to get the feel of it. I no longer had to let go of the right knitting needle, take the yarn, put it over the needle tip, pick up the needle again, knit the stitch, and start over again. All I had to do was hold the yarn in my left hand and knit away. Ribbing was no longer a nightmare that took me a month for 2” around a 7-8” circumference. To work ribbing I just moved my first finger back and forth about an 1”.

That was the smiling woman at the open door, waving me to come on in to the world of knitting. Continental knitting for me was the magic turning point. Suddenly I could knit a scarf in time increments of hours or days instead of months or years. That was just the first step though. Gaining a better understanding of knitting really made a difference. Understanding things cuts back on the fear. Let’s face it, it’s fear making us drag our feet in so many things.

Friday, February 13, 2015

Knitting Short Rows

Knitting Short Rows

Sometimes knitting terms are intimidating when the actual procedure is not a big deal at all. Take knitting short rows. It can sound far more elaborate than it is. I know that when I first started knitting when I heard terms like short rows and grafting I put my hands up in front of my face in fear. Oh, no, there’s that term short rows. Scary! But really it is so simple. That can happen in a lot of things in our lives. Imagining something we don’t understand can make it far more than it really is. Knitting a short row only means that as you are knitting, you turn and work back before completely working all the stitches on the needle. Really, that is it. If you are following a pattern’s instructions you could easily work a short row without even knowing that’s what you did.

Say you are working a flat piece that has 24 live stitches. The instructions say to knit 10 stitches and turn and purl or knit 7 stitches then turn and knit to end of row. Boom, you just made two short rows. Pretty simple isn’t it?

Say you are working in the round with DPNs and there are 8 stitches on each of three needles. The instructions say to knit 6 stitches on first needle then turn and purl 4 stitches and then turn and knit 6 stitches. You are back to being ready to move to the second needle and you just made two short rows.

Now the question is, why use short rows? For shaping. When making sweaters short rows along the back or in the bodice can make the sweater more form fitting. When making toys you can create all sorts of controlled bulges.


Take the finger puppet faces below. Short rows make sculpted faces possible with really very little complication.


Saturday, January 31, 2015

Lucet Braiding Leather and Cords

The vikings used lucet tools to braid straps and cords.
But they probably did not use a fork.
They did use antlers and bones, however.


I have tried many things to make braided cords for wrist straps, purse straps, and such. The i-cord is great. Unfortunately it can take 1-2 hours to make a cord. Then I found a handy crank machine that kicks out i-cord in no time flat. Unfortunately it is limited to a specific diameter of yarn or thread. Leather does not work in it at all. Now I found a Lucet tool. Wow! It’s great. It takes about 15 minutes to make a leather cord the perfect length for a wristlet strap. 

First I found a three-pronged fork at the local thrift store. For 10 cents it was worth getting for experimenting. I also found a 49 cent two pronged kitchen fork which did not work. That’s 49 cents down the drain. I will donate it back to the thrift store. 

The three pronged dinnerware fork really worked well, except that my fingers did get a bit rubbed raw. I had not actually realized before that dinnerware forks are actually sharp edged. I incorporated a crochet hook into the process and saved my fingers.


Finally, I ordered a wood Lucet from a shop on Etsy. Quite an economical price, really. I tried to make one myself first, out of oak, in the winter, in an unheated garage, with a jigsaw because I did not want to dig out the scroll saw. It was cold. For $12 it was easier to purchase one made by a professional. 

Oh, so beautiful! It’s hickory. It feels wonderful in the hand. The shape is perfect for even tension while wrapping. I whipped out the purple cord in about 15 minutes while watching the evening news. To knit that length of i-cord would have taken 1-2 hours and the yarn is a chunky yarn and would never have gone through the crank machine. I am so happy!

When I was looking for a Lucet tool I saw a lot of videos and articles about Lucet cording where they mentioned things that it could be used for. It makes cords! That’s enough for me. I use cords in a lot of ways. The biggest advantage to me is for purse and bag straps, of course. But I have a lot of window curtains that need tie-backs. 

With all the sewing I do you would think I could do better than an old bathrobe tie for a curtain tie, right? Once I decide on the right yarn or leather, all the window curtains are getting new ties. When I first moved into the house I bought cording by the foot and estimated a bit too low so some of my ties only give me a few inches to use to secure.

Using the Lucet tool is so easy that it’s a good child’s project. Need some straps? Hand the tool to your kids and put them to work. I can easily see kids really enjoying doing this. The result is wonderful and goes fairly swiftly.

Thursday, January 29, 2015

 Rolled Hem Knit Hat

This is such a comfy hat and knits up in no time flat.


Rolled Hem Hat
Homespun Yarn (medium weight 5)
Size 10 16” circular needles
Gauge: 3 st/1”

CO 54 with color A
Row 1-8: K54 (54)
Row 9: K1, P1 rib (54)
Row 10-25: K54 (54)
Row 26-27: K54 with color B (54)
Row 28-29: K54 with color A (54)
Row 30-35: K54 with color B (54)
Row 36-37: K54 with color A (54)
Row 38-39: K54 with color B (54)
Row 40-48: K54 with color A (54)
Row 49: K54, place markers after each 12 stitches (54)
Row 50: K1, K2tog after each stitch marker, SSK, before each stitch marker. (46)
Row 51: K46
Row 52: K1, K2tog after each stitch marker, SSK before each stitch marker (38)
Row 53: K38
Row 54: K1, K2tog after each stitch marker, SSK before each stitch marker

Repeat row 52 until 8 stitches remain. Cut yarn, leaving 12-14” tail, use tapestry needle to thread live loops onto tail. Tighten. Tie off and weave in end of yarn.

The reason the row of K1, P1 ribbing exists is to act as a brake to stop the stockinet roll.
This is a very basic hat. If you want or need a longer hat, just knit a few more rows after the last stripe before starting the decreases.

The blue hat and cream hat are made with Homespun yarn. The black hat with sparkles is Wool-Ease Chunky and is a tighter fabric using size 10.


Sunday, January 25, 2015

Stretchy Knit Cast On

I have found a very handy long tail version for casting on when working in ribbing that is so much easier than the provisional cast on. A lot of my projects are worked in the round and I find this quick and effective. There is a slight flare but it's minimal and the ease to use this cast on outweighs the impact of the flare.

Excuse the image but my Wacom tablet was being touchy today so I just used my mouse to draw the image.

Looking at the top image you will see the hand is in position for a standard V-shaped long tail cast on. You will grab the yarn at A and then at B.

In the bottom image you will notice that the yarn tail has been switched to rest inside the thumb area, between thumb and index finger. You will grab the new A position and then grab at B.

Count the slip stitch as stitch one and cast on with standard long tail cast on every even number and the alternate every odd number. After you have cast on several stitches you will notice that they appear paired up and one of the pair has a purl looking bump. Voila! you have cast on in ribbing format and it was as easy as shifting the yarn tail from outside of thumb to inside of thumb.

It is easy to switch. Just drop yarn from thumb and pick up in new position. Once you have done a few it will be second nature.

Sometimes I even cast on with this stretchy cast on when not working in ribbing because it gives the hem a nice, non-tight edge.

Hope you try this!


Friday, September 5, 2014

Making a Mobile Display Floor


Did you notice my lovely wood display floor in some of my recent posts?

Most of us are not fortunate to have a lovely studio space where we can set up backgrounds and displays for our picture taking. I know I don’t. So I was looking for some ideas of mobile displays. Simple things that can be brought out easily and then be put away without taking up a lot of space. I looked at the vinyl floor mats and stuff like that and besides the cost of the nice looking ones, they were still sort of clunky when it came time to figuring out where to store them when not in use.

I have a lovely friend who cut up some flooring boards. You know, the kind that slide together with little lips and slots. I am sure there is a technical term for the ridges and where the ridges go into neighboring boards but since I am not a floorer and no one will depend on my accurate use of construction terminology we will just call them slots and ridges. Just hit me that they are tongue and groove, right? All right, who really knows that anyway? Tongue and groove or slots and ridges, the end result is the same. They slide together and sort of stay in place. Once the boards are secured to something the slots and ridges hold things together nicely.

So, what to do? What to do? Nailing them down onto some big piece of plywood makes them clunky and cutting down the plywood to manageable size is not convenient. So, I had a light bulb go off above my head. I often have light bulbs flashing away up there. I tacked the boards to a canvas framed painting that I had done years ago, never liked, never got rid of, and felt no remorse in covering up. I tacked down the board with a nail thicker than the board. Then slid the next board’s groove into first board’s slot and tacked that board in place. And so forth.


Result, a handy, mobile floor that looks great for macro pictures. The frame of the canvas painting provides handy hand holds when putting mobile floor away after using. Away right now means standing it up next to the foam core boards covered with patterned paper, which are leaning against the wall on the shelf where I take the pictures. I have a few more boards that I plan to stain for a different finished look.


If you want to do this yourself, local hardware stores have cheap flooring boards with tongue and groove edges for a reasonable price. These aren’t the $20/linear foot boards. These are the $15-20 for a cello wrapped bundle eight feet high. It would look nice if a few were offset also, I think.

I just love it! It works so well and is so handy and I think the resulting photos look great. It's wonderful to have a handy friend with leftover wood from a house project who cut up a few leftover boards into the perfect working size.

Friday, August 29, 2014

Making Fabric Napkins


Fabric napkins are so wonderful to have on hand to use. I am always amazed at how many people say that fabric napkins are too fancy, a paper napkin or paper towel will suffice. Not fancy. Fabric napkins are economical, practical, and environmental. Grab a fabric napkin out of the drawer and when it has been used just toss it in the wash with towels or shirts or underwear. No big deal.

To make fabric napkins is a snap. The hardest part about making them is picking out the material. For every day casual use, just grab some canvas or twilled cotton. Just feel it at the fabric store. It should be absorbent and easy to clean. Avoid fabrics that are dry clean only. Other than that, the sky is the limit when it comes to picking fabric. You could even upcycle old towels or fleece items. That sort of heavy fabric could be difficult to hem but you could just use pinking sheers to cut fleece into 18" squares for super simple napkins. I prefer the cotton or a linen for absorbency.

I have used fabric napkins for years and years. My favorite ones are 18” squares. Fabric napkins can be made exactly like the earlier post for flannel baby washcloths. The only difference is the size and fabric choice. I suppose you could use flannel for your napkins also but I think a nice cotton or canvas will work better. But if you want to be fun, pick a colorful flannel print and use that.

Cut 18 ½” squares of your fabric choice. Serge edges. Fold over corner and fold sides down to get mitered corner and sew. You can also just straight stitch the four sides half an inch in and fray edges for a fringed effect. I have a set of fringed napkins and I don’t care for the fringed ones for daily use. I mean, they’re fine, but I notice I only reach for those when all the rest are gone from the drawer.

Have fun. Be brave. There aren’t really rules, just suggestions and guidelines to create a product in the process of having fun. See Baby Flannel Washcloths post earlier this month for more detailed instructions. 

Thursday, August 21, 2014

Super Simple Fabric Bone Dog Toy

Want a quick and easy project that results in a toy for your furry friend?

Let’s face it, our little buddies shred fabric dog toys so we want to avoid spending too much money buying toys and avoid spending too much time making toys. Here is a quick and easy project. It will probably take about ten to fifteen minutes to make because of hand sewing the opening shut and it will take about the same amount of time for the dog to destroy it.

Download free PDF pattern. Or just draw a rough bone shape. That’s what I did for the pattern in the PDG.  When printing it be sure to uncheck the Fit Image box or it will slightly distort pattern. Then again, it doesn’t hurt anything. Don’t spend a lot of time fussing. Trust me, when you watch Fido destroy the toy in ten minutes you will be glad you did not spend an hour trying to get pattern to print out exactly spot on.
(Trying to get PDF to work but it's complicated. For now use image below and I will post PDF file when I can.)
Image is available as download option on Facebook page.

I cut out pattern with 1/4" extra from line for seam allowance. You can cut right on the line or add 1/2" extra room outside the line. The only difference it makes is slightly in size, depending on style of fabric. I used some scrap piled furry fleece here.


Cut out two pieces of fake fur, fleece, or your fabric choice. Sew around shape, leaving a small opening for turning and stuffing. How much stuffing you use depends on how much you want to pick up off the floor later.

Turn, stuff, and whip-stitch opening closed.


There you have it, a quick and easy dog toy!

Here's pattern in image form. You should be able to right-click and copy to print. I will work on getting PDF download available when possible.


Thursday, August 14, 2014

Sew-In Labels

Using Ribbon and Iron-on Transfer Paper

Supplies:
1 ½” wide white, ivory, or light colored satin ribbon
Iron-on Transfer Paper for light fabrics
Word
Printer
Iron
Scissors

I know I posted information about labels a few years ago but here is an updated version.

I made my Robyn label unique by using a Type Mask in Photoshop with a lilac as a background but if you don’t have Photoshop you can still get some creative font and color combinations in Word. The horse image is a picture that I created in Photoshop. If you use images for labels on products you sell be sure not to use copyrighted images unless you buy the rights to use them.

I found the easiest way to create the multiple images per sheet was to copy an image into Word, tweak to get the size that I wanted, and then copy and paste the image to fill up the page. For 1 ½” ribbon I set up image to just under 1”. Once I create the master sheet I saved it to use over and over again.


Keep in mind that the image must be reversed because once you iron on the image from the back side. You can either do that step by flipping image in Word before copying it the multiple times in document. Or a lot of printers will give you the option to reverse it in print setup. My printer will automatically reverse image if I select iron-on transfer in paper type. You will need to investigate reversal options for your specific printer. I highly recommend printing on a plain piece of paper to verify final result then print on iron-on transfer paper.

I cut the printed iron-on transfer paper into strips with a trimmer and then use a scissors to cut the strip into smaller pieces and clean up excess blank space. But if you don't have a trimmer a scissors works fine. The trimmer just speeds up the process.

Cut 3” sections of 1 ½” wide ribbon and fold in half then press. This gives you a defined edge to line up image with to give consistent results. Now press image face side down on ribbon. It takes a high heat to transfer image so the little craft irons don’t normally work. You can try one to see if your craft iron is hot enough but I stick with a regular iron. When label has cooled, peel away paper.


You now have labels that can be sewn into your projects’ seams. For purses I like to tuck the end of the ribbon behind patch pockets or I will put on side of lining while making lining. You could serge or zigzag stitch at bottom edge of ribbon but it isn’t necessary. You could also iron image directly onto fabric of lining but I find that it’s difficult to see that way.

You could use fabric instead of ribbon. With ribbon the sides are finished and by folding it in half and sewing the ends within a seam the finishing is done in one step. If you use fabric you will have to finish the edges of the label.

Thursday, August 7, 2014

Flannel Baby Washcloths


I started making these for baby shower gifts. The first time I made up a basket with a rubber ducky and bath items including several of these little flannel washcloths. The washcloths are always such a hit that people that get them ask about getting more.


 Cut 8” squares of flannel.
 Serge edges if you have a serger. (Sew zig-zag stitch with regular machine if serger not available.)


Fold corners then fold sides ¼” and sew.


That’s it! Such a simple project with wonderful results.


Thursday, August 29, 2013

Winter Robin Purse

I like to play with photography. I went out one frosty winter morning to take pictures of the frosted trees in the fog and spotted this robin. I waded through the knee high snow as he bounced from tree to tree. This is one of my favorite shots from that day. It placed in the local camera club and was awarded a merit at regional level. So I decided to turn it into a purse.

As much as I love to take great photos and am always off on the hunt for images that catch my attention because I see an awesome opportunity for a memorable capture, I also like to use images. I have a Canon photo quality printer. There are printable fabric sheets available in craft stores. I also have the process for taking any cotton fabric and preparing it to run through the printer. If anyone has used the sheets available to purchase then they know the price is a bit on the high side.

There isn't a high clarity picture walking around on a purse on my shoulder but there is a quite acceptable copy of one of my favorite pictures.  I plan on making more. I am a huge fan of sunflowers and every summer I go on a quest to find sunflower fields. The next photo purse will be using some shots of sunflowers. I think anyone could give it a try even if it's not for a purse. I believe that the sheets were first created for the quilting world. They go right through the printer without any problem. Just be sure to use a high quality photo. It doesn't have to be an award winning picture but it will lose some clarity so have as much as possible to start.

In the next few weeks I will post the pattern for this handy little bag on my shop on Etsy. I designed this bag for carrying the essentials and am quite pleased with it. It was the perfect size for the printed photo without losing much more than the edges, such as if it was framed. I have a welt zippered pocket inside but the basic purse is quite easy to make.

Thursday, August 1, 2013

Camera Bag Insert Handy


I've been taking a lot of pictures with my DSLR camera and in preparation for a trip to the Rockies in Alberta Canada I wanted a camera bag. Looking at nice camera bags created price shock though so I looked at inserts, handy padded frames that could be inserted into any bag. You can buy inserts at a reasonable price online but I decided to make my own, wanting a custom fit. Okay, and let's face it, I like making things myself.

I made the purse like a normal purse with pockets inside for cell phone and zippered pockets inside and out and then made the camera insert. I found instructions for the insert online and used a thick yoga mat instead of buying the expensive green foam that was turning yellow on the edges that was available at the fabric store. The yoga mat was easy to cut and work with. I tweaked the insert pattern/instructions a bit, adding an extra inch on all sides of bottom piece so I could sew it to side piece on machine instead of hand stitching it together as instructed. I also sewed the bottom to the side with the Velcro on the outside then flipped it after sewing it. This gave bottom a neat, finished look and held structure together more firmly. I made two foam dividers, one attached to hold camera snuggly and one for a spare. These dividers are movable wherever there is Velcro.

I used one lens and had room for a water bottle, wristlet, phone, bag of snack food and hiked for almost 6 hours with this bag over my shoulder and it was like it wasn't even there. In hindsight I wouldn't have gone with zebra stripe for hiking in the mountains but back down in the city I didn't look like a tourist toting around a giant camera bag.

And the camera insert can easily be pulled out and the purse used as a regular purse.

Tuesday, April 17, 2012

Colorful Crochet Tote


I saw a really fantastic crocheted tote being made on a tv show and I did my own tweaking and this is what I got. The original was made with double strands of the same, solid color in varying stripes. I never saw a pattern but it's pretty straightforward-a base and sides with alternating single crochet and double crochet stitches throughout entire bag. My twist is the double strands of different, variegated yarns. The small tote is made with a starting chain of 14 using an H hook. The big tote is made with a starting chain of 20 using a J hook. Other than that they're roughly the same.

Using Lion Brand Tweed Stripes:
Start with both Caribbean and Woodlands colors, chain 14. Single crochet, double crochet across, increase at end and go back down other side until you get an oval the size you want the base of bag to be. Now only crochet in back loops of stitch to get the sides started and no more increasing past base. Continue with these two colors for a few inches, then switch the Caribbean with Mixed Berries and continue to crochet with double yarn of Woodlands and Mixed Berries for a few inches, then switch out Caribbean for Prism for several inches, then go with Caribbean and Woodlands again and then Prism and Woodlands and back to Mixed Berry and Prism or Caribbean. Finish edge with a crab crochet stitch and sew on some straps and the result is a fun, functional tote.
I haven't added a closure yet because I haven't decided if I want to make a lining. If I do the lining I will add a snap closure. If I don't do a lining I will add a button and lacing or elastic. Because it's double stranded it's a fairly sturdy bag on it's own but if it's to be used as a purse then it's nice to have pockets and I don't want to add pockets on the outside because I don't want to cover up all that glorious color combination.

Monday, October 3, 2011

iPod Case and Card Holders


I've made a steady stream of simple wallets, card holders, and iPod cases but I haven't posted them to the shop yet. Summer was quite hectic and busy and now that fall is settling in I'm putting some focus on the shop again. Plus, I must admit, I have given quite a few away and taken many, many for my own use. They are so handy for so many things.

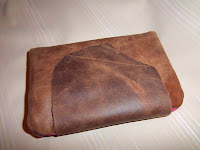
The one pictured I made specifically for my iPod Touch. The little zippered section is for the earbuds. Then there are two pockets on either side. Most of the ones I have ready to post to shop this week (once I get photos done) are card holders and wallet-sized. The iPod holder is between the two but I plan on making some iPod specific soon.

Leather is always a challenge on a home sewing machine. I splurged a few months ago and bought a new sewing machine with additional bells and whistles though my old one is still doing fine. I think I'll dedicate the old one to sewing leather projects. Despite the occasional broken or bent needle and unhappy sewing machine I so like the results, which is why I keep doing the leather projects.

Sunday, June 26, 2011

Cosmic Pony on Facebook

Don't forget that Cosmic Pony is also on Facebook. If you get the chance check it out. There's a link on the right side of the page.

Saturday, June 25, 2011

Pink Pearlized Leather Hobo


Apologies for being away for so long. My computer decided to fade into a slow decline this spring. In all fairness, it was a wonderful computer that lasted a long time and even as it started to have issues, at least it was slow and steady so I had time to transfer data and use it still until new computer arrived but it made computer activities a draining experience so blog was not on list of priority uses. I highly suspect that the removal of PSE will grant it additional life but since I need and use PSE it had to be replaced. I went with an all in one computer this time and I really am so happy with it.

I have been working on leather wallets and card holders but first I must show you the lovely pink pearlized leather hobo I recently made. It's an eye catching purse and the leather is just amazing. I went with the hobo silhouette to best showcase all that lovely pink pearlized color. I did run into some issues with attaching the straps. Because of the thickness, sewing through that many layers marred the strap and I didn't notice until I was done. So I won't put it up for sale. What I did was add some slipcovers but they are "bumpy" so I won't put it up for sale. I did consider cutting strap down and attaching slip covers then attaching to some spring hooks to regain the length from cutting but in the end decided to just keep it for myself. It was little frustrating because I had been so cautious and careful throughout the process--pink pearlized leather is not cheap. Then at the very end saw the marring on the straps. If I had noticed it on the first attached end I could have slid covers on before attaching second end. Alas, I thought I was in the home stretch all clear. Oh well, now I will be using it instead of putting it in the shop.

Thursday, February 3, 2011

Russian Spiral with Crystals, Oh My


Whew, finally got several Russian Spiral bracelets and necklaces posted to the shop. It was a lot of time involved with this one. I feel like they're my little kids being shot out into the wide world. I have them laying on the table on this mat because I was shooting them in order to help streamline the crop and post process and every time I walked by they sparkled and glimmered at me like little stars in an evening sky. It's tough to capture that in photos. I have some good memories of working on this and suddenly the cat pouncing on bits of light dancing across the floor and up the walls when the room filled with sunlight.

I have some more to finish details with and then will be adding them as well. I can't decide between big brown glass beads or smaller tigereye beads for the finishing touch on my topaz spiral with crystals, for example. And I'm thinking of changing out the magnetic clasp bracelets for good old secure lobster claw clasps. I'm just not satisfied with the performance of the magnetic clasp. They seem fine and then the magnetic pops out of the casing. I've lost a bracelet and necklace already because of the magnetic clasps. Losing it could be prevented with a small safety chain but it wouldn't solve the non-working clasp.